Games
PCB
Archive
Chip
Archive
Cart/Box
Scans
Articles
Peripherals
Prototypes
Unreleased
Games
Rarities
Homebrew
Emulation
Links
Email: snes_central@yahoo.ca
BS F-Zero Grand Prix 2 |
 BS F-Zero Grand Prix 2 introduces 4 new machines and 5 new tracks to the old F-zero mix. While an F-Zero fan such as myself enjoys the new challenges, this is not a full fledged sequel, and merely an add-on released on Nintendo's Broadcast Satellaview. By: Evan G |
One of the awesome things about the Broadcast Satellaview was the creation of new add-ons to old games. One of those games was F-Zero. Now this is certainly not the sequel to F-Zero that many might have been led to believe (given the 2 in the title). This is merely the "sequel" to the BS F-Zero Grand Prix series, which appears to be some sort of competition involving the leagues from the original F-Zero using 4 new Machines. In that series, they also had 5 brand new tracks, which they decided to release as BS F-Zero Grand Prix 2 as the Ace competition. This is very nice, because the original Grand Prix titles are not really worth looking at.
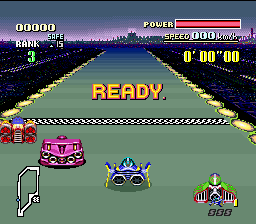
The original BS F-Zero Grand Prix titles show off exactly what many Satellaview titles were all about. They basically start off with a huge wait for a connection, then a car selection screen, then another 6 minute "practise" run of each track. After the practise run, you finally get to race. I personally do not know if people actually faced off in networked competitions in these titles, but that would certainly explain the loading times.
BS F-Zero Grand Prix 2 is a nice bonus, as it lets you cut out the loading times and focus on the single player racing action. Unfortunately it does not give the option to save high scores or your progress, but considering you are already using an emulator to play you can use savestates. Another disappointment which is far worse is that they do not include all the original tracks, so you can't test out the new machines on the old tracks. The new machines look nice, but other than that, there is no upgrades graphically or sonically. There is also no new tracks to unlock by passing the game. You can unlock the Expert mode if you beat it on the hard difficulty level, which is the only real bonus. Though for F-Zero junkies, the promise new tracks is appealing, even if it is only 5.
New Machines
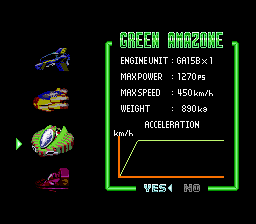
When it comes to the new machines, they are largely modelled after the originals, though they do present some new variety. The Blue Thunder machine is the average racer. The Luna Bomber acts like a tank, and is difficult to control, making it best for those who tend to crash into other racers. The Green Amazone offers the fastest acceleration, though it is by far the slowest racer. The Fire Scorpion has the slowest acceleration, but is easiest to control.
As for which racer is best, it really is a matter of taste. I personally had a lot of success with the Blue Thunder machine, and didn't have much luck at all with the Green Amazon. When you get to harder difficulty settings, having a slow machine just doesn't cut it. For experts, the Luna Bomber replaces the original Fire Stingray as the speed demon, but you certainly pay for it with the unresponsiveness of the controls and slower acceleration. Several of the tracks have a series of extremely tight curves, so it makes using this machine a matter of practise.
 |
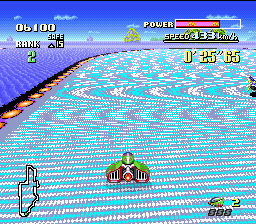
| Boost Strips in Mute City IV |
Mute City IV
To start off with the summary of the new tracks, we have the classic Mute City course. Mute City IV is not really that difficult except for two sections where you are faced with unavoidable boost strips. The first set is particularly nasty, as if you don't veer to the right after about the fourth one, you are sent flying off course. You can make it back on track, as there a big section of jump plates just off course, but it is extremely difficult when you already had a huge amount of momentum taking you away. At the second set of boost strips, be prepared to hit the brakes right after the last one, as there is a 180 degree turn immediately following. If you aren't prepared, it will send you careening into a very large rough zone in the opposite direction that you want to go. After the curve, you reach the best spot to use one of your boosts.
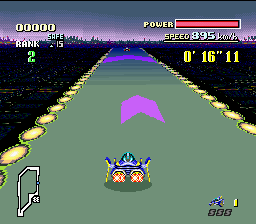
 |
| Ice zone in Big Blue II |
Big Blue II
Probably the easiest course overall in this new set is the return of Big Blue. Big Blue II doesn't offer a whole lot of new challenges over the original except a tricky spot with a series of jumps. After the third turn, veer to the left to reach a jump plate that acts as a small short cut. Just beware that if you don't have a good amount of speed, you will likely crash out there. Press down before you hit it to gain some extra air time. This is especially necessary with the Green Amazone machine, as it doesn't have a very fast high speed. You should land on a zone of jump plates, and it should be pretty easy to get back on course. Immediately after the jumps, there is an ice zone, so hold off on the acceleration if you don't have your machine under control or there is a lot of traffic. Near the end of the course you face a huge ice field that is identical to the original Big Blue course. If you take it easy, this is a pretty easy zone to get through. After the last turn is the best spot for doing a boost.
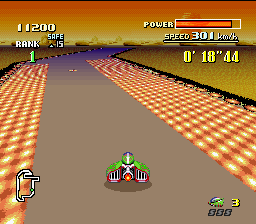 |
| Heat zone and mines in Sand Storm I |
Sand Storm I
Sand Storm I is an extremely short course, but that does not mean it isn't a challenge. You are first presented with a series of 90 degree turns. After about the fifth turn, the course becomes lined with energy draining heat zones, with mines in the centre of the track for good measure. Going on the heat field is a better strategy than hitting a mine if the course is crowded. The biggest challenge to not start the ricochet that can happen if you hit a mine, as when coupled with the heat field, it will drain you quickly. The best place to boost is right when the start line is in sight, or if you are more daring, when you are in the mine field. The bonus of doing it through the mine field is that you get through the risk faster, plus it is the second longest straightaway on the course followed by a gentle turn.
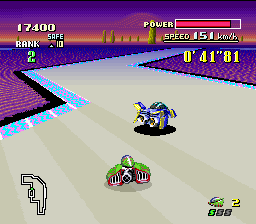 |
| Silence II lined with jump plates |
Silence II
Silence II is probably my favourite of the new tracks. Interestingly, the course is in the shape of a gun. After a couple of gentle turns, you are greeted by some mines. The first set is pretty easy to avoid, but immediately after there is a 90 degree turn, and more mines. Two strategies for the second mine section are to take a hard left and try and use the jump plate to go over them, or to take the outside of the curve and avoid them on the right side. If you get caught up in the mines, it is pretty easy to lose most of your energy. After another 90 degree turn, the course becomes lined with jump plates. Take the first turn into them easy, especially if there is a competitor going in with you. One false move, and it is game over. When the course splits into two, you can take advantage of the jump plates to get a small boost and shortcut. After the jump plate section and two easy turns, you reach the best area to use a boost.
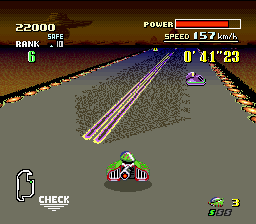 |
| Magnetic divider in Sand Storm II |
Sand Storm II
As soon as you start this course, you will immediately notice the pull of the magnetic rails. This most difficult part of this course is not to get caught in a ricochet if you hit a curve too quickly. With a bunch of competitors on the track, it becomes a great challenge to keep from crashing out. About halfway through the course, there is a nasty section with a magnetic divider in the middle of the track, lined with a rough field for good measure. The magnetic pulls balance themselves out just on the edge of the rough, which will slow you down a bit, but certainly puts you in a much less risky position. This is my favourite place to use a boost, though if you keep your energy up, the start line is the longest straight-away.
Graphics: 8/10
The graphics in this game are essentially identical to the original F-zero, which means graphics that were considered top notch for 1991. They haven't aged as well when compared to later SNES games, but they certainly aren't horrible. The frame rate is excellent, and the mode-7 effects keeps things going. The machines were apparently created using the same Silicon Graphics modelling that made Donkey Kong Country look so good. They are given a couple of extra frames of animation to make them look a bit better when turning compared to the original racers.
Sound: 8/10
The sound is exactly the same as the original F-zero. I still mutter at the cutting out of the music when some of the sound effects happen, but given the limitations, I guess it has to be forgiven.
Play Control / Gameplay: 10/10
The play control is extremely responsive. You may curse when you crash out, but usually it is due to poor racing skills, and not the control. I still think it is a bit cheap how badly you can lose control after nudging another racer, but I suppose at the high speeds it is trying for some realism. :p
Overall Score: 8/10
F-zero is one of the best racing games of all time, but five new courses just isn't enough. I don't know why they didn't include the original courses to let you try out the new machines on the old tracks. Still, as I said before the new courses are very nice and should be checked out by any F-zero fan.