Games
PCB
Archive
Chip
Archive
Cart/Box
Scans
Articles
Peripherals
Prototypes
Unreleased
Games
Rarities
Homebrew
Emulation
Links
Email: snes_central@yahoo.ca
Super NES Innards Exposed! |
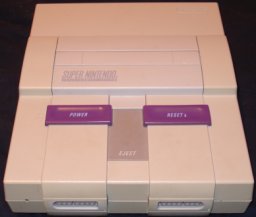 We here at Snes Central have gone at great lengths to expose the mysterious innards of Super NES. Everything has been dismantled and photographed for your viewing pleasure. By:
Evan G
|
I decided earlier today that my Super NES was very dirty, and deserved a cleaning. And after nearly 15 years of steady ownership, why not? The snes was covered is miscellaneous spilt liquids and ground in dust. Since I had a proper bit to open it up, I opened it up to find a very dust bunny filled snes. A shot of compressed air cleared it up pretty quickly. For the top, I figured the easiest way to clean it up would be to dismantle it and use some good old soap and water. Here is the top of the unit, deconstructed:
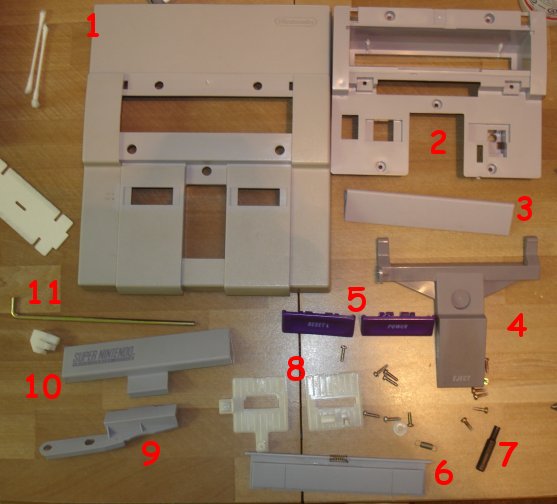
1) The main top piece. It holds everything together! All the other parts of the "top" all screw into this chunk.
2) The shell that holds the power and reset switches in place. Also, the opening where the carts go.
3) A chunk of plastic that ultimately goes on the top part of the cart opening.
4) The eject button.
5) Power and reset switches.
6) The flap on top of the cart slot.
7) Screwdriver bit to open the snes
8) Pieces that connect the power and reset switches to the switches on the motherboard
9) This piece is pushed into the groove in the cart to prevent you from removing the cart when the power is on.
10) The piece of plastic that goes right below the cart slot. Also has that great Super Nintendo Entertainment System logo on it.
11) This bar holds the eject mechanism in place on the motherboard section.
Closeup of the cart slot, with tabs removed to allow Japanese games to be played.
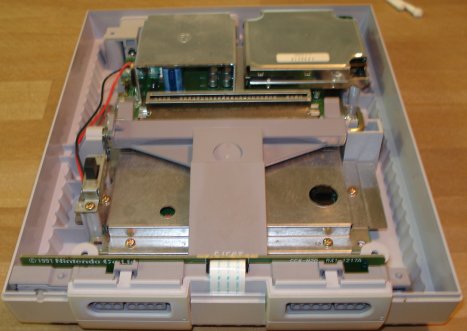
The bottom part of the snes, containing the motherboard. At the bottom, you see the snes controller ports, which are connected to the motherboard with a wire ribbon. The motherboard is mostly covered with pieces of metal, to keep our prying eyes away. The top right corner has the sound chip. Maybe they kept it off the motherboard in case they had to get away from Sony (oh wait).
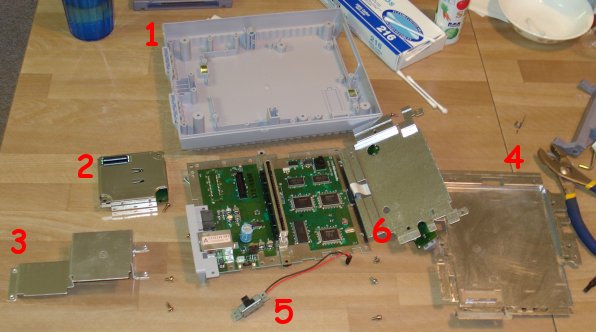
Here we have a completely dismantled snes. Pretty, ain't it! Lots of metal casing to protect the tender innards.
1) The bottom plastic casing. Not nearly as complex as the top piece. The only opening is the "mysterious" port, which was never used for anything.
2) The sound chip. The casing was much more difficult to get off this sucker, but I managed to do it (see later pictures).
3) This casing protects this huge capacitor (1000 microfarads), as well as all the stuff that connects to the power cable, tv-out, etc.
4) This metal sheet goes on the bottom of the motherboard.
5) This is the power switch. It is easily removed from the motherboard (unlike the controller port cable, which I almost destroyed).
6) The unsheathed motherboard. I couldn't take off the metal sheet because I could not remove the controller cable. C'est la vie.
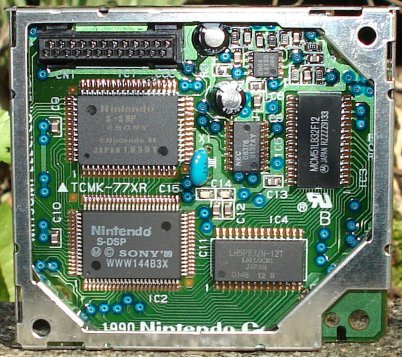
The hard to access S-DSP chip, made by Sony. Seriously, it took a lot of effort to get into this. My fingers are still sore. I'm sure the snes hardware experts could go into what each of the chips do, but that person isn't me!
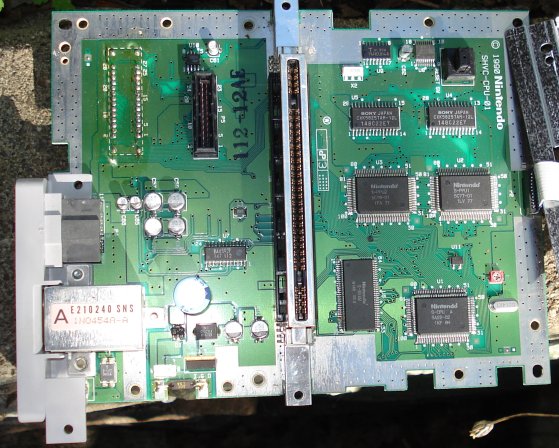
Yes, I had to go outside to get a good picture of the boards. The indoor lighting sucks, and my camera can't take good indoor photos without blurring everything. However, because it was such a nice, sunny day, we get a nice photo of the snes motherboard. Everything except the sound chip are there! You have your CPU, your PPU, your RAM, your cart slot, and some chips made by Sony. The chips were made in early December 1991, making this an early snes model. The date on the back of my snes indicates that it was finished up in February 1992. Awesome.
So that is the interior of the snes. It is certainly a nice machine, and it was nice taking it apart to have a look. I did get a scare when my controllers didn't work afterwards, but shoving the controller ribbon back into place did the trick. Don't try and pull that thing out with pliers, you will fail! As an extra bonus, I am the SNES MASTER!!!!
As always, there are a ton of higher resolution pictures here.
Scans
- Super NES Console - Top
- Super NES Console - Bottom
- S-DSP Chip and related PCB
- Large picture of the motherboard of the SUPER NES
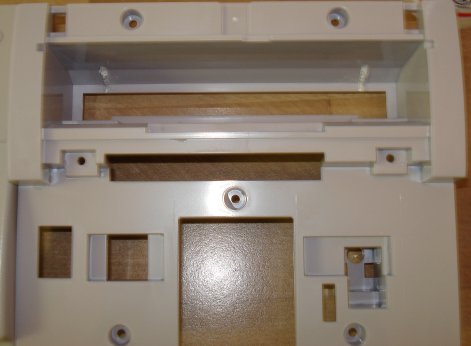
- The underbelly of the top section of the snes